
When it comes to building safe and stable structures, the foundation is everything. But did you know that the soil beneath your building plays a critical role in determining the strength and durability of that foundation? Soil testing is an essential step in structural engineering that ensures your project is built on solid ground—literally. In this blog post, we’ll explore why soil testing is crucial, the common methods used, and how soil conditions impact the stability of your structure.
Why Soil Testing is Critical for Foundation Design:-
The soil beneath a building is the foundation’s support system. Its properties directly affect the design, construction, and long-term performance of the structure. Here’s why soil testing is indispensable:
- Determines Soil Bearing Capacity:
- Soil testing helps engineers understand how much weight the soil can support without settling or failing.
- This information is critical for designing foundations that can safely carry the load of the building.
- Identifies Soil Type and Composition:
- Different soil types (e.g., clay, sand, silt, rock) have varying properties that affect stability.
- For example, clay expands and contracts with moisture, while sandy soil drains quickly but may shift under pressure.
- Detects Potential Risks:
- Soil testing can reveal issues like poor drainage, high water tables, or the presence of contaminants.
- Addressing these risks early prevents costly problems during or after construction.
- Ensures Compliance with Building Codes:
- Most local building codes require soil testing to ensure the safety and stability of structures.
- Skipping this step can lead to legal issues and project delays.
Common Soil Testing Methods:-
Structural engineers use a variety of soil testing methods to gather accurate data about the soil’s properties. Here are some of the most common techniques:
1. Standard Penetration Test (SPT):-
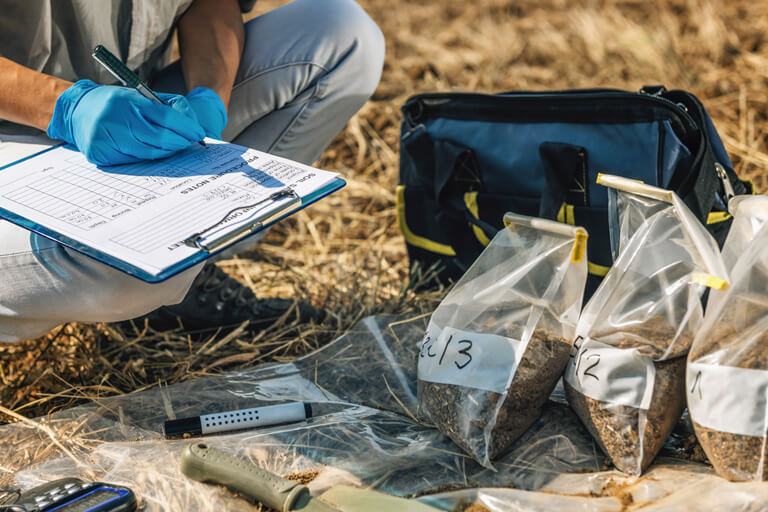
- What It Is: A drill rig drives a split-spoon sampler into the ground to collect soil samples.
- Why It’s Used: It measures soil resistance and provides information about soil density and strength.
2. Cone Penetration Test (CPT):-
- What It Is: A cone-shaped probe is pushed into the soil to measure resistance and friction.
- Why It’s Used: It provides continuous data on soil layers and is faster than SPT.
3. Plate Load Test:-
- What It Is: A steel plate is placed on the soil, and a load is applied to measure settlement.
- Why It’s Used: It directly measures the soil’s bearing capacity.
4. Moisture Content Test:-
- What It Is: Soil samples are dried to determine their moisture content.
- Why It’s Used: Moisture content affects soil strength and stability, especially in expansive soils like clay.
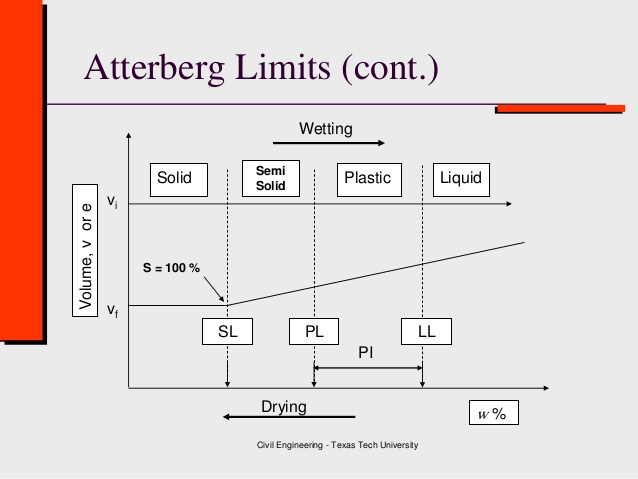
5. Atterberg Limits Test:-
- What It Is: Measures the soil’s liquid limit, plastic limit, and shrinkage limit.
- Why It’s Used: It helps classify soil and predict its behavior under different moisture conditions.
6. Permeability Test:-
- What It Is: Measures how quickly water flows through the soil.
- Why It’s Used: Important for drainage design and preventing water-related issues.
How Soil Conditions Impact Structural Stability:-
The type and condition of the soil directly influence the design and performance of a building’s foundation. Here’s how:
1. Settlement and Subsidence:-
- Poorly compacted or unstable soil can lead to uneven settlement, causing cracks in walls, floors, and foundations.
- Soil testing helps engineers design foundations that minimize settlement.
2. Expansive Soils:-
- Soils like clay expand when wet and shrink when dry, leading to foundation movement.
- Engineers can recommend solutions like deep foundations or soil stabilization to address this issue.
3. Liquefaction:-
- In earthquake-prone areas, saturated sandy soils can lose strength and behave like a liquid during seismic activity.
- Soil testing identifies liquefaction risks, allowing engineers to design earthquake-resistant foundations.
4. Slope Stability:-
- On sloped sites, soil testing helps assess the risk of landslides or erosion.
- Engineers can design retaining walls or other stabilization measures to ensure safety.
5. Drainage and Water Table:-
- High water tables or poor drainage can weaken foundations and cause water infiltration.
- Soil testing provides data for designing proper drainage systems.
Case Study: The Role of Soil Testing in a High-Rise Project:-
A recent high-rise project in a coastal city faced challenges due to the presence of soft clay and a high water table. Soil testing revealed the need for a deep foundation system using piles to reach stable soil layers. The data also guided the design of a robust drainage system to manage groundwater. Thanks to thorough soil testing, the building was completed safely and remains stable despite the challenging soil conditions.
Conclusion:-
Soil testing is a cornerstone of structural engineering that ensures the safety, stability, and longevity of any construction project. By understanding the soil’s properties, engineers can design foundations that withstand the test of time and environmental challenges. Whether you’re building a small home or a massive skyscraper, investing in soil testing is a decision that pays off in the long run.
FAQs
1. Why is soil testing important before construction?
Soil testing ensures the soil can support the structure, identifies potential risks, and helps engineers design a safe and stable foundation.
2. How much does soil testing cost?
Costs vary depending on the project size and testing methods, but it typically ranges from 500 to 5,000.
3. Can soil testing prevent foundation problems?
Yes, soil testing helps identify issues like poor drainage, expansive soils, or weak bearing capacity, allowing engineers to address them before construction begins.
4. What happens if soil testing is skipped?
Skipping soil testing can lead to foundation failure, uneven settlement, and costly repairs down the line.
5. How long does soil testing take?
The process usually takes 1-2 weeks, depending on the site conditions and testing methods.
Read More On:-
For more information about engineering, architecture, and the building & construction sector, go through the posts related to the same topic on the Specuwin Blog Page
Find out more accurately what we are going to take off in the course of applying leading new technologies and urban design at Specuwin