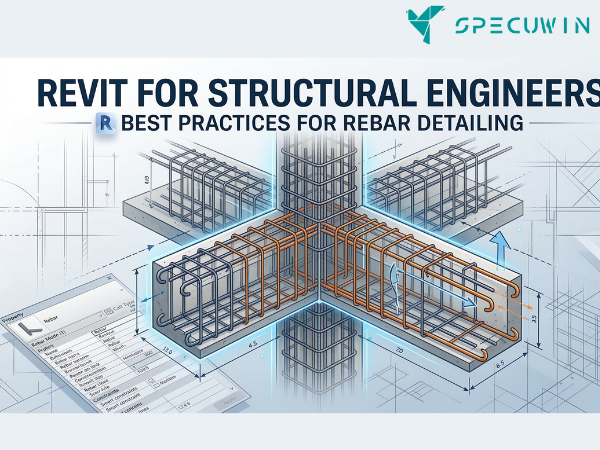
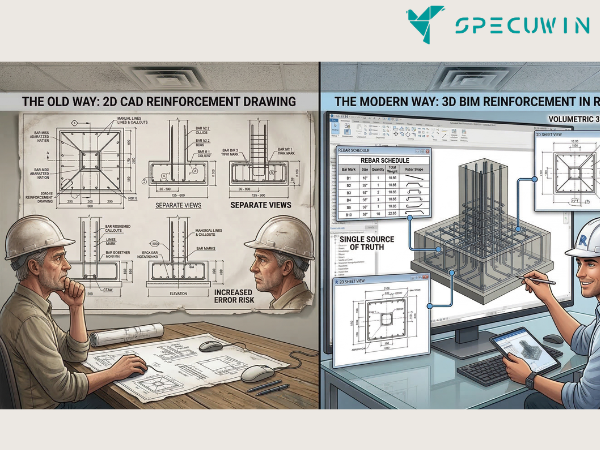
The shift from 2D CAD to 3D Building Information Modeling (BIM) has fundamentally changed how we approach reinforcement. For those utilizing Revit for Structural workflows, the goal is no longer just drawing lines; it is about creating a “single source of truth” where the 3D model, the schedules, and the 2D sheets are perfectly synchronized.
Effective rebar detailing in Revit is a blend of technical precision and strategic modeling. Whether you are working on a massive infrastructure project or a complex residential high-rise, streamlining your reinforcement modeling is the key to reducing fabrication errors and improving site coordination.
The Strategic Importance of Revit for Structural Reinforcement:-
In the traditional workflow, a change in a beam’s dimensions often meant manually updating four different sections and a schedule. When using Revit for Structural engineering, a parametric change to a host element can automatically adjust the rebar within it. However, the power of Revit comes with the responsibility of managing model weight and clarity.
To excel, engineers must move beyond “just placing bars” and start thinking about “constructability.” This guide explores the best practices to ensure your 3D rebar is accurate, performant, and ready for the field.
1. Establishing a Robust Revit for Structural Template:-
Before placing a single stirrup, your project environment must be prepared. A cluttered or ill-equipped template is the primary cause of detailing delays.
- Define Rebar Bar Sizes: Ensure your project has the correct bar diameters and bend radii according to local standards (e.g., IS, ASTM, or Eurocode).
- Standardize Hooks and Bends: Pre-load all necessary 90°, 135°, and 180° hooks.
- Reinforcement Settings: Configure your “Rebar Rounding” settings early. Precision to the nearest millimeter is great for the model but impractical for the bending yard.
2. Mastering Host-Based Modeling in Revit for Structural Workflows:-
Revit treats rebar as a “hosted” element. This means the rebar belongs to the concrete member (the host).
Cover Settings are Non-Negotiable:
Always define your concrete cover settings before modeling. Use the Rebar Cover tool to apply specific offsets to different faces of a beam or column. This ensures that when you place a rebar set, it automatically snaps to the correct clear cover, maintaining structural integrity and fire rating requirements.
Using Rebar Sets vs. Individual Bars:
Whenever possible, use Rebar Sets (Fixed Number, Maximum Spacing, etc.) rather than copying individual bars. Sets are easier to schedule, faster to modify, and significantly reduce the “element count” in your model, which keeps the file size manageable.
3. Enhancing Visibility in Revit for Structural Views:-
One of the biggest hurdles in 3D detailing is “seeing” what you are doing.
- View Visibility States: Use the “View Visibility/Graphics Overrides” to show rebar as solid elements in 3D views. This is crucial for checking clashes.
- Color Coding by Bar Size: Use Filters to color-code rebar by diameter. For example, make all 16mm bars blue and 20mm bars red. This allows for an instant visual audit of the reinforcement layout. This type of visual clarity is why The role of technology in structural analysis and design is becoming a staple in modern firms.
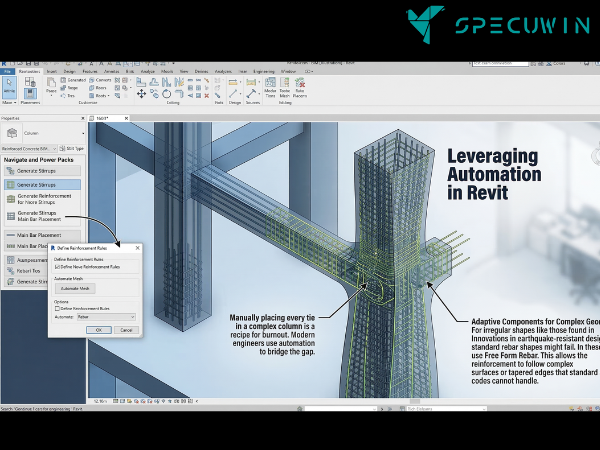
4. Leveraging Automation in Revit for Structural Detailing:-
Manually placing every tie in a complex column is a recipe for burnout. Modern engineers use automation to bridge the gap.
Navigate and Power Packs:
There are several third-party plugins designed specifically for Revit for Structural detailing. These tools can automate the generation of stirrups, main bars, and even complex mesh reinforcement based on predefined rules.
Adaptive Components for Complex Geometry:
For irregular shapes like those found in Innovations in earthquake-resistant design standard rebar shapes might fail. In these cases, use Free Form Rebar. This allows the reinforcement to follow complex surfaces or tapered edges that standard shape codes cannot handle.
5. Clash Detection and Coordination:-
A primary benefit of 3D detailing is identifying “hard clashes” before they reach the site.
- Internal Clashes: Check for rebar-on-rebar congestion, especially at beam-column joints.
- External Clashes: Coordinate with MEP (Mechanical, Electrical, Plumbing) models. Nothing stops a project faster than a 4-inch pipe trying to pass through a high-density rebar zone.
- Digital Twin Integration: Detailed rebar models serve as the backbone for The revolutionary impact of digital twins on facility management and operations. Knowing exactly where the steel is located is vital for any future structural modifications.
6. Scheduling and Documentation from Revit for Structural Models:-
The model is only as good as the data you can extract from it.
- Multi-Rebar Annotations: Use the “Multi-Rebar Annotation” tool to tag entire sets quickly.
- Bending Schedules: Create schedules that include “Shape Images.” A visual representation of the bar shape next to its dimensions significantly reduces errors at the fabrication shop.
- Weight Calculations: Use calculated parameters in your schedules to get real-time tonnage reports. This helps in staying within the material budget discussed in The impact of material selection on structural integrity.
7. Performance Optimization for Large Projects:-
When you model every single bar in a 40-story building, Revit can slow down.
- Workset Management: Put your rebar on a dedicated Workset. Keep this workset turned off in most views to improve navigation speed.
- Detail Levels: Use “Coarse” or “Medium” detail levels during the modeling phase. Only switch to “Fine” when you need to see the actual bar thickness for clash detection or final sheet production.
- Section Boxes: Work within small section boxes to limit the number of elements Revit has to render at one time.
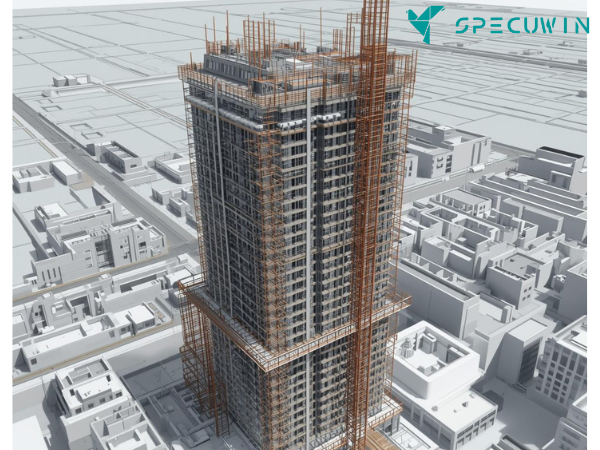
The Future of Revit for Structural Detailing:-
As we move toward “LOD 400” (Level of Development), the expectation for high-fidelity reinforcement models is growing. We are seeing a trend where How AI and robotics are revolutionizing AI in construction allows for automated rebar tying and even 3D-printed reinforcement cages. By mastering these best practices today, you are positioning yourself for the highly automated job sites of tomorrow.
FAQ’s:-
1. Does modeling every bar in Revit for Structural projects make the file too heavy?
A. Yes, if not managed correctly. Using Worksets to turn off rebar visibility and utilizing “Rebar Sets” instead of individual instances will keep your model performant.
2. Can I export Revit rebar data to fabrication machines?
A. Absolutely. You can export data to Industry Foundation Classes (IFC) or use specific extensions to generate BVBS files, which are used by automated bending machines.
3. How do I handle rebar in non-standard shapes?
A. For curved or complex geometry, use the Free Form Rebar tool. It allows you to align reinforcement to surfaces that don’t follow standard XYZ planes.
4. Is 3D rebar detailing faster than 2D CAD?
A. Initially, the setup takes longer. However, the time saved during revisions and the total elimination of manual scheduling errors make it significantly faster over the project lifecycle.
5. How does Revit for Structural modeling help with site safety?
A. By modeling rebar in 3D, you can identify areas of high congestion. This allows engineers to simplify the design before it hits the field, making it easier and safer for ironworkers to install.
Read More On:-
For more information about engineering, architecture, and the building & construction sector, go through the posts related to the same topic on the Specuwin Blog Page.
Find out more accurately what we are going to take off in the course of applying leading new technologies and urban design at Specuwin.